There’s nothing more important than your baby’s health and safety. Sterilizing your baby’s bottles is crucial in killing bacteria that can lead to serious health problems and illness no matter if you are using the best baby bottles. Because the newborn baby’s immune system is still not developed well and the resistance is relatively poor, the baby bottle is the item that the baby needs to enter the mouth every day. If it is disinfected, it may threaten the baby’s health. While hand-washing can be sufficient for daily cleaning, sterilization should be done at least once a week in order to truly eliminate harmful bacteria buildup. If your baby has been sick, make the extra effort to sterilize baby bottles frequently so that they won’t get sick again from lingering germs and bacteria. Also, always make sure to sterilize brand new bottles before giving them to your baby, ensuring that they are completely free of germs.
There are several different methods on how to sterilize your baby’s bottles, all of which will effectively disinfect and make the bottles safe for your baby to use.
Different Ways for How to Sterilize Baby Bottles
Using Clorox Regular-Bleach to Clean Baby Bottles
One of the oldest and easiest methods for how to sterilize baby bottles is by using bleach. To disinfect bottles and nipples, first wash them with soap and water. Then, place them in a solution of Clorox© Regular-Bleach and water (a ratio of 2 tsp bleach to one gallon of water), letting them soak for two minutes. For extra cleaning, pour the solution through each of the nipples. Lastly, drain all items dry. Using Clorox© Regular-Bleach to sterilize your baby’s bottles will save you time, making it less of a disruption in your already busy schedule. Check Clorox website for more tips.
Boiling Baby Bottles (My favorite way of sterilizing baby bottles and accessories)
Another age-old method for sterilizing bottles is by boiling them. First, bring a pot of water to a boil, using enough water to completely cover all of the bottles and nipples. In the meantime, hand-wash all items to remove any visible grime. Once washed, submerge all pieces completely in the boiling water. Let them soak and boil for 3 to 5 minutes. Then, carefully remove the pieces from the water with tongs and leave them to dry, upside-down, on a drying rack.
If you’re sterilizing glass bottles, place them in the pot of cold/room-temperature water before you turn on the stove, and then bring the water to a boil. Glass is sensitive to drastic changes in temperature, also known as thermal shock, and dropping the bottles directly in boiling water can cause them to crack or break. For plastic bottles, use only those that are BPA-free. Otherwise, harmful chemicals can seep into the milk or formula when the bottle is exposed to heat. It is also best to check whether the baby bottle nipple is damaged before disinfection, because boiling water will damage the nipple more easily than other disinfection methods.
Boiling is a convenient way of how you can sterilize your baby’s bottles without having the added expense of buying an appliance or the hassle of using cleaning products.
Electric Steam Sterilizers
A less cost-effective method of how to sterilize bottles is by using an electric steam sterilizer. Electric steam sterilizers are able to remove bacteria and deodorize bottles by using a heated steaming effect. Many parents enjoy the timing feature electric sterilizers possess, allowing them to multitask while the bottles are cleaning themselves. Although convenient, care needs to be taken when filling the unit with water. After several uses, regular water can cause a buildup of mineral deposits inside the sterilizer, damaging the heating element and making the sanitizing process ineffective. Due to this, it’s recommended that only distilled water for bottle sterilizer is used to sterilize the bottles. Also, because the use of heat is involved in this method, make sure your plastic bottles are BPA-free.
There are a few simple steps for how to use an electric steam sterilizer. First, make sure each item has been rinsed and cleaned of any visible grime. Next, measure out the appropriate amount of water and pour it into the unit. Be sure to use the recommended amount for your device, because having too much water in the unit can cause leaks and having too little water won’t disinfect the bottles appropriately. To load the bottles, make sure they’re set upside down so that the steam can reach the insides of each bottle. Never put more bottles in the unit than what is recommended. Place all accessory items far enough apart so that they don’t touch. Secure the lid and turn on the device so that the steaming process can begin. When finished, remove the bottles and accessories and either let them air dry or use a clean towel to wipe off any excess moisture.
The Dr. Brown’s Electric Steam Sterilizer is perfect for disinfecting your baby’s bottles quickly and efficiently. With a capacity for six bottles and a tray for accessories, you can have all of your baby’s items safely sterilized in as little as twelve minutes. Although specifically designed for use with Dr. Brown’s bottles, most standard baby bottles can be used as well. Although a bit more costly than other methods, the Dr. Brown’s Electric Steam Sterilizer is a reliable way to thoroughly disinfect and sterilize your baby’s bottles. You can also check our picks of the best baby bottle sterilizer.
Microwave Steam Sterilizers
If you’re looking for a quick method for how to sterilize your baby’s bottles, using a microwave steam sterilizer can be a great option for you. Similar to electric steam sterilizers, these products disinfect by using a steaming effect that’s created at high temperatures. Microwave steam sterilizers provide a safe way to effectively remove up to 99.9% of bacteria from all of your baby’s bottles and accessories. Majority of these units contain a removable rack that allows steam to rise and disinfect the bottles. Not only does it take less time to disinfect, but microwave sterilizing units also don’t require extra counter space like electric steam sterilizers do. Also, make sure your plastic bottles are BPA-free.
In regard to how to sterilize bottles with a microwave steam sterilizer, there are a couple of easy steps that need to be followed. First, make sure each item has been rinsed and cleaned of any visible grime. Next, take out the bottle rack, if removable, and pour the recommended amount of water into the base. Some brands have a line in the base to indicate how much water is needed, otherwise be sure to consult the instruction manual. Once the base is filled with water, replace the rack and load your baby’s bottles, upside down, and any accessories you’d like to sterilize as well. The unit should have a specific slot for each item to go in. Next, secure the lid and place the unit in the microwave for the amount of time designated in the instruction manual. Lastly, allow the unit to cool for a few minutes and set the bottles and accessories on a drying rack to dry.
The Munchkin Steam Guard Microwave Sterilizer is one of the top rated brands for microwave steam sterilizers. Able to disinfect four regular or wide-mouth bottles at one time, this compact unit comes with a removable rack and can be used in any standard microwave. Recommended water amount for proper sterilization is 7 fl. oz. of distilled water. Consult the instruction manual for microwave times. To clean the unit itself, place all parts in the top rack of the dishwasher.
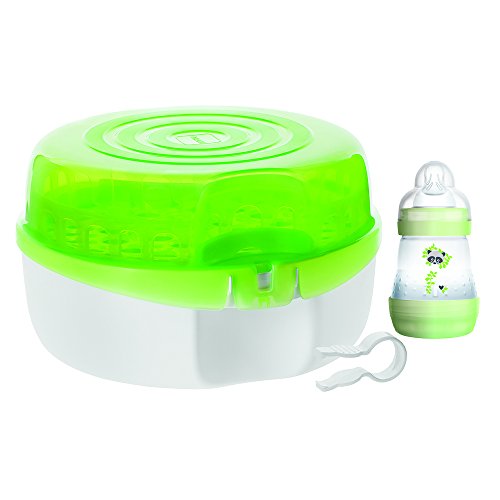
I used MAM Microwave Steam Sterilizer which is a great product that can effectively sterilize up to six of your baby’s bottles at once in as little as five minutes. After the container is removed from the microwave, the items can stay sterile in the sealed unit for up to 24 hours. The unit is compatible with all standard microwaves and can also double as a cold water sterilizer.
When needing a safe and efficient product for sterilizing your baby’s bottles, these two Microwave Steam Sterilizers will be the right choice for you.
Cold Water Sterilizers and Sterilizing Tablets
The cold water sterilization method is ideal if you’re traveling and/or searching for how to sterilize bottles without the use of a microwave, stove, or outlet. This process entails submerging each bottle and accessory item in a basin filled with cold water, and using the water to sterilize rather than steam. Most microwave steam sterilizers can double as a cold water sterilizer, just be sure to remove the bottle rack/tray before use. Cold water sterilization also includes the use of sterilizing tablets, which work to kill all germs and bacteria while your baby’s item are soaking in the cold water.
To receive the best results, follow these guidelines on how to sterilize bottles by using the cold water sterilization method. First, make sure each item has been rinsed and cleaned of any visible grime. Next, fill the basin with the recommended amount of cold water, ensuring that there is enough water to completely cover all items. Add the sterilizing tablet, preferably one that is made to work with the brand of sterilizer that you’re using. Next, submerge each bottle so that they fill up with water and add accessory items. You can either use the bottle tray, if you’re using a microwave steam sterilizer, or a heavy plate to keep the items underneath the water during the disinfecting process. Lastly, allow the items to soak for at least ten minutes before removing to dry. Consult your product’s instruction manual for exact time amounts.
The Milton Cold Water Sterilizer is a trusted product that is endorse by professionals for its exceptional bottle sterilization. Able to disinfect six bottles at once in fifteen minutes, this unit guarantees the removal of all harmful bacteria and germs from your baby’s bottles and their accessories. Paired with Milton Sterilizing Tablets, the Milton Cold Water Sterilizer will ensure that your baby’s bottles are safe for use, resulting in a happier and healthier baby. Both of these products work well together for complete bottle sterilization.
How to Store Sterilized Bottles
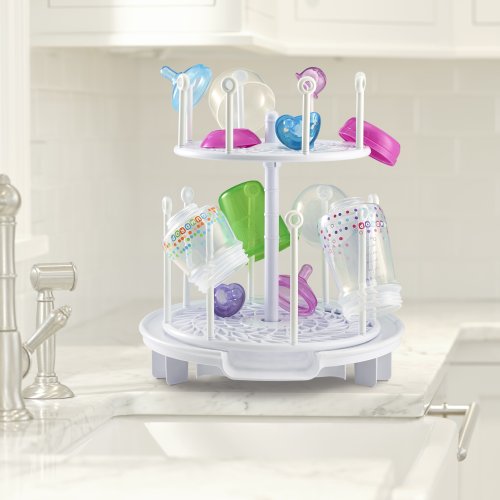
After your bottles are sterilized, the last thing you want is to expose them to bacteria right away. To avoid re-contamination, place all bottles that won’t be used right away in a secured storage area that’ll protect them from common household bacteria sources (i.e., countertops, sinks, air). Make sure all items are completely dry before storing. Drying racks made specifically for baby bottles are ideal for drying items that have recently been sterilized.
The First Years Spin Stack Drying Rack has a vertical design that can hold either sixteen bottles or a combination of bottles and accessories. The water will drain right into your sink and the drying rack fits conveniently in a kitchen cabinet. The First Years Spin Stack Drying Rack is perfect for how to store bottles and accessories that you’ve sterilized.
Your baby uses bottles frequently on a daily basis, so it’s important that these items stay clean and free of harmful bacteria. By sterilizing your baby’s bottles at least once a week, you’re protecting them from developing potentially serious health issues and illness. While there are many different ways how you can sterilize bottles, each method is effective at removing bacteria and germs, making your baby’s bottles safe for everyday use.


2 thoughts on “How to Sterilize Baby Bottles”